")

Creating a WordPress blog doesn’t have to take days or weeks. This step-by-step WordPress blog tutorial shows busy entrepreneurs, small business owners, and bloggers exactly how to build a professional website in just 30 minutes.
You’ll get the complete WordPress website setup guide that cuts through the confusion and gets you online fast. No technical experience required—just follow the exact process I used to go from zero to published blog in half an hour.
We’ll cover choosing the right WordPress hosting and domain setup that saves you time and money upfront. You’ll also learn the fastest WordPress theme installation process and discover which essential plugins actually matter for a new site. By the end, you’ll have a fully functional WordPress blog ready for your first post.
Choose Your WordPress Hosting and Domain in 5 Minutes
Select a reliable hosting provider with one-click WordPress installation
Start your WordPress blog setup by choosing a hosting provider that offers one-click WordPress installation. Popular options like Bluehost, SiteGround, and HostGator provide this feature, making your WordPress blog setup incredibly fast. Look for providers with solid uptime records, 24/7 support, and SSD storage. Most budget-friendly plans start around $3-5 monthly and include free SSL certificates. The one-click installation feature eliminates technical complexity, letting you create WordPress blog fast without manual database configuration or file uploads.
Register your domain name or connect an existing one
Your domain name serves as your blog’s digital address, so pick something memorable and relevant to your niche. Most hosting providers offer free domain registration for the first year with hosting plans. If you already own a domain, you can easily connect it through your hosting control panel by updating nameservers. Choose a .com extension when possible, as it’s the most trusted and memorable. Keep your domain short, avoid hyphens, and ensure it reflects your brand or blog topic for better SEO performance.
Complete the hosting setup and access your control panel
After purchasing your hosting plan, you’ll receive login credentials via email within minutes. Access your hosting control panel (usually cPanel or a custom dashboard) where you’ll find the WordPress installation option. Click the WordPress installer, select your domain, create admin credentials, and launch the installation. The entire process takes 2-3 minutes. Once complete, you’ll receive your WordPress admin URL, username, and password. Bookmark your admin area (yoursite.com/wp-admin) for easy access to manage your new WordPress website setup.
Install WordPress Using the Fastest Method
Use your hosting provider’s one-click WordPress installer
Most modern web hosts offer WordPress installation through their control panel dashboard. Look for buttons labeled “WordPress” or “Auto Install” in your hosting account. Popular hosts like Bluehost, SiteGround, and HostGator provide this feature directly from their main dashboard. Click the installer, select your domain name, and the system handles the technical setup automatically. This WordPress blog setup method eliminates manual file uploads and database configuration, completing installation in under five minutes.
Configure basic WordPress settings during installation
During the one-click installation process, you’ll need to create your admin username and password. Choose a strong password and memorable username since these credentials provide access to your entire WordPress dashboard. Select your site title and tagline – you can change these later, but having them ready speeds up the process. Some installers ask about automatic updates and backup preferences. Enable automatic updates for security patches to keep your WordPress blog secure from day one.
Access your new WordPress dashboard for the first time
After installation completes, your hosting provider sends login credentials to your email address. Navigate to your domain followed by “/wp-admin” (yoursite.com/wp-admin) to access the WordPress dashboard. Enter the username and password you created during installation. The dashboard presents a clean interface with menus for posts, pages, themes, and plugins. Take a moment to explore the main sections – this becomes your command center for managing content and customizing your WordPress website setup.
Pick and Install a Professional Theme Instantly

Browse free themes in the WordPress repository
WordPress offers thousands of professionally designed themes through its official repository. Navigate to Appearance > Themes in your dashboard, then click “Add New” to explore options. Use filters to narrow down choices by layout, features, or subject matter. Popular themes like Astra, OceanWP, and Twenty Twenty-Three provide excellent starting points.
Install and activate your chosen theme
Once you find your ideal WordPress theme installation candidate, click “Install” then “Activate.” The process takes seconds and immediately transforms your site’s appearance. WordPress handles all technical aspects automatically, ensuring proper file placement and database updates. Your previous content remains intact while adopting the new design structure.
Preview your site’s new appearance
Visit your site’s front-end to see the transformation in action. Most themes include demo content placeholders that show layout possibilities. Check how your existing pages and posts display within the new design framework. Mobile responsiveness and loading speed are automatically optimized with quality themes from the repository.
Configure Essential WordPress Settings in Minutes

Update site title, tagline, and basic information
Navigate to Settings > General in your WordPress dashboard to configure your site’s identity. Change the default site title from “WordPress” to your actual blog name – this appears in browser tabs and search results. Your tagline should be a brief, keyword-rich description of what your blog covers. Update your admin email address to ensure you receive important notifications about your WordPress blog setup.
Set up permalink structure for SEO optimization
Head to Settings > Permalinks and change from the default “Plain” structure to “Post name” for clean, SEO-friendly URLs. This transforms ugly links like “yoursite.com/?p=123” into readable ones like “yoursite.com/your-post-title.” Search engines and visitors prefer descriptive URLs that include your target keywords. Custom structures work too, but “Post name” strikes the perfect balance between simplicity and optimization for your WordPress website setup.
Configure user roles and account settings
Under Users > All Users, review your admin account and create additional user accounts if needed. WordPress offers built-in roles: Administrator (full control), Editor (manage posts/pages), Author (publish own content), Contributor (write but not publish), and Subscriber (read-only). For solo bloggers, stick with Administrator. If building a team blog, assign appropriate roles to maintain security while allowing collaboration on your WordPress blog.
Adjust privacy and visibility preferences
Visit Settings > Reading to control your site’s visibility. Choose “Discourage search engines from indexing this site” only during development – uncheck this before launching your live blog. Set your homepage to display either your latest posts (traditional blog style) or a static page (business-style homepage). Configure how many posts appear on your blog page and in RSS feeds to optimize loading speed and user experience.
Install Must-Have Plugins for Functionality and Security
Add Essential Security Plugins for Protection
Security plugins are your first line of defense against hackers and malware. Install Wordfence Security or Sucuri Security to monitor suspicious activity, block malicious login attempts, and scan for vulnerabilities. These plugins add firewalls, two-factor authentication, and real-time threat detection to keep your WordPress blog safe from cyber attacks.
Install SEO Optimization Plugins
Yoast SEO or RankMath will boost your blog’s visibility in search engines. These WordPress essential plugins help optimize your content for target keywords, generate XML sitemaps, and provide readability scores. They guide you through meta descriptions, title tags, and internal linking strategies that improve your search rankings and drive organic traffic to your new blog.
Set Up Backup and Maintenance Plugins
UpdraftPlus or BackupBuddy automatically creates copies of your entire WordPress site and stores them in cloud services like Google Drive or Dropbox. Schedule daily backups to protect against data loss from server crashes, plugin conflicts, or accidental deletions. These plugins also handle one-click restoration, so you can quickly recover your blog if something goes wrong during your WordPress blog setup process.
Customize Your Site Design Without Coding
Use the WordPress Customizer to modify colors and fonts
Access the WordPress Customizer by navigating to Appearance > Customize in your dashboard. This powerful tool lets you modify your site’s colors, fonts, and typography in real-time. Choose your primary brand colors for headers, buttons, and links. Most themes offer multiple font combinations – select one that matches your blog’s personality. Preview changes instantly before publishing to ensure your WordPress site customization looks perfect.
Upload your logo and customize the header
Upload your logo through the Customizer’s Site Identity section. WordPress automatically resizes your logo for optimal display across devices. Adjust the header layout, background color, and text positioning. Add a tagline that describes your blog’s purpose. Configure the header’s sticky behavior to keep your navigation visible while users scroll. Test different logo sizes to find the perfect balance between visibility and page loading speed.
Set up navigation menus and sidebar widgets
Create your main navigation menu under Appearance > Menus. Add essential pages like Home, About, Contact, and your main content categories. Drag and drop menu items to reorder them logically. Configure sidebar widgets through Appearance > Widgets to add functionality like recent posts, social media links, and email signup forms. Popular widgets include search bars, category lists, and tag clouds that help visitors navigate your content effectively.
Configure homepage layout and featured content
Design your homepage layout using the Customizer’s Homepage Settings. Choose between displaying your latest blog posts or a static page. Create a compelling hero section with your best content or a welcome message. Set up featured post sections to highlight your most important articles. Configure the number of posts displayed and their excerpt length. Add call-to-action buttons that guide visitors to subscribe or read your most popular content.
Create Your First Pages and Content

Build Essential Pages Like About and Contact
Start with your About page to introduce yourself and establish credibility. Navigate to Pages > Add New in your WordPress dashboard, then craft a compelling story about who you are and why you started blogging. Include a professional headshot and your expertise areas. For your Contact page, add a simple contact form using the Contact Form 7 plugin or your theme’s built-in form builder. Include your email address and social media links to make it easy for readers to connect with you.
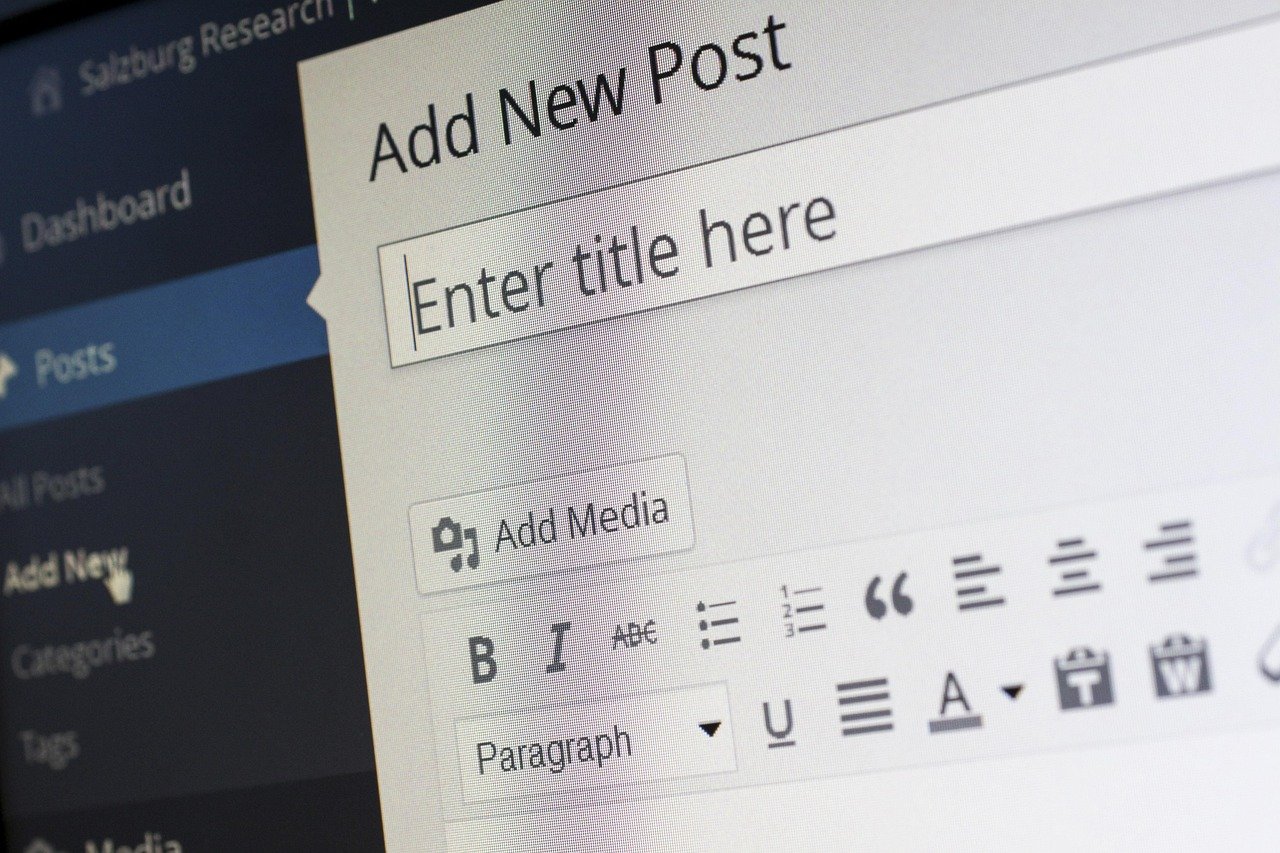
Write and Publish Your First Blog Post
Create engaging content that showcases your expertise and gives visitors a taste of what to expect. Go to Posts > Add New and write about a topic you’re passionate about. Keep your first post between 800-1200 words, use clear headings to break up the text, and include a compelling introduction that hooks readers immediately. Add relevant tags and categories to help organize your content for better navigation and SEO performance.
Add Images and Media to Enhance Your Content
Visual content transforms bland text into engaging posts that keep readers scrolling. Upload high-quality images through the Media Library, ensuring they’re optimized for web use (under 100KB when possible). Add alt text to every image for accessibility and SEO benefits. Consider creating custom graphics using Canva or similar tools, and don’t forget to include featured images for each post to make your blog visually appealing in search results and social media shares.

Building a WordPress blog really doesn’t have to take forever. With the right hosting provider, a one-click WordPress installation, and a solid theme, you can have your site up and running before your lunch break ends. The key steps we covered—from choosing hosting and installing WordPress to setting up essential plugins and creating your first content—form the foundation of a professional-looking website that’s ready to grow with you.
The best part? You don’t need to be a tech wizard to pull this off. Modern hosting platforms have made the process so streamlined that most of the heavy lifting happens automatically. Now that your blog is live, focus on creating valuable content and connecting with your audience. Your 30-minute investment in setup is just the beginning—the real magic happens when you start sharing your voice with the world.


